Imagine: you are just about to graduate from college. You are engaged to the man of your dreams. You are about to get married, but you have NO IDEA HOW TO COOK! This is most of us in our 20’s: clueless in the kitchen. Up until now your dorm had a cafeteria, your sorority house had a cook, or if you lived out, Top Ramon was the go-to meal of the day.
Back in 1971, this was my parents. They were in their graduate years at San Jose State, getting their teaching credential and about to get married in June. They were about to rent their first apartment in Sunnyvale, CA together and my mom had no idea how to make one single meal. And she knew every good wife 🙂 needed a “go-to” meal you could cook. So what did she do? Took a cooking class.
In that cooking class, she learned how to make fried wontons, stuffed chicken and our favorite recipe to come from her schooling is the famous Waldorf Astoria Cake. ‘Cuz every good wife needs to know how to make a 3 layer, made-from-scratch cake to serve here guests, and her man! 😉

Making the Cake

Now most of you would know this cake as a Red Velvet Cake. But back in the 70’s, red velvet was not as popular, or even KNOW to most folks. I remember my mom making it for my birthday one year (I think I was in 3rd grade) and NO ONE ATE IT!!! Kids not eating cake?!!! What’s wrong here??
Mix the Wet Ingredients

Let’s get baking, why don’t we?! 🙂 Preheat your oven to 350 degrees. Cream together the shortening and sugar. SHORTENING?!!! So rare, right? This is truly the secret ingredient to making this cake moist as can be. Indulge. It’s only once a year… (or maybe twice if one gets ambitious).

Add the eggs, 1 at a time.
TIP: crack the eggs in a measuring cup first. Sometimes you’ll get “an icky one” an you don’t want to spoil the whole bowl of goodness!

In a separate bowl, make a paste of the cocoa, vanilla & red food coloring.
Spoonful of Laughter
Isn’t that measuring spoon so cute?! Wouldn’t it be a cute wedding favor or Galentine’s gift? It was actually a gift from my mom, years ago. I found the same ones here. The heart shape is adorable but that saying is so fitting coming from my mom. She had the most distinct and truly pure laugh of anyone. In fact, that laugh is what reunited my parents. True story! My dad heard her laugh in a crowd and went to find her. They were reunited and married 9 months later. 🙂


Add the red paste to the creamed mixture:

Dry Ingredients
Do you sift your flour? I’m going to confess: I don’t sift my flour for MOST recipes. Cookies, quick breads, and other baked goods I usually don’t sift UNLESS the recipe calls for it. (Even then…I can be a bit of a rebel.) For this recipe, I ALWAYS SIFT the cake flour. I just want it to be PERFECT!


Sift your cake flour, spoon into measuring cup, level with a flat knife and set aside.
Measure out your buttermilk in a liquid measuring cup.
Start adding sifted flour and buttermilk a little at a time, alternating until all is incorporated, starting with flour and ending with flour.


Add baking soda and vinegar, mix until incorporated and set aside while you prep your cake pans.


Prepping The Pans
If you want to avoid an “Oh Crap” moment, this is the trick for making a cake that WON’T stick to the pans.

- First, cut rounds of parchment paper that fit into the bottom of the pan. They don’t have to be perfect. I usually eye-ball it. An easy trick is to place your pan on top of the parchment paper and trace the shape, then trim to the INSIDE of that outline. Set the 3 paper circles aside.
- Next, grease the bottom and sides of the cake pans. I used Crisco. 🙂

- Place 1 pre-cut parchment round in to the bottom of each of the three cake pans.

- Grease the top of the parchment paper, again using Crisco.

- Lastly, sprinkle about 1 Tbsp. flour in the bottom of each pan and shake around the bottom and sides of the pan to lightly coat the whole thing with flour.

Pour batter in prepared baking pans and bake at 350 degrees for 20+ minutes, or until a toothpick comes out clean. Let cool on your counter for 30+ minutes. Run a knife around the side of the cake, invert and let fully cool on racks until you are ready to frost.

Making the Frosting
This stuff is A-MAZ-ING!!! It’s a little tricky, I’m not gonna lie. (I’ve been known to have to make it twice to get it right.) But the results are sooo worth it.
(Note: for the picture above, I tried making one and a half recipe because the main frosting recipe does not make a ton of frosting. You will see below that the consistency wasn’t quite right. Grrr…. The full-proof method would be to make 1 recipe of the frosting and if you needed more, make another recipe. I just never have any luck steering away from the original recipe.)
First, heat the milk and flour over low heat, whisking constantly till the mixture begins to thicken. Think: the consistency of a thick buttermilk or pancake batter. Set aside to cool completely.

Measure out butter and beat on medium for 1 minute. Add cooled milk and 1 tsp. vanilla to the butter. Beat on HIGH for 3+ minutes till mixture becomes silky smooth. (Note: mine did NOT become silky smooth…but no worries. The next step will FIX that…)

THE FIX: Add 1 c. powdered sugar, 1/4 c. at a time until well incorporated and little peeks begin to form in the batter. If it’s still “runny”, add more powdered sugar, 1/4 c. at a time till you like the consistency.
Frost the Cake
To frost the cake (sorry…I didn’t get too many pictures here!) I use a frosting knife similar to this one.
- Place a dollop of frosting on your cake plate. (about the size of a golf ball)
- Place first cake layer on the center of the cake plate. Frost just the top layer of the cake to edge (as pictured above).
- Place second cake layer on top of frosted first layer, and frost the second layer, top only.
- Place the third and final layer to the top of the second layer and frost top AND all sides with a “crumb coat”*.
- Place cake in refrigerator to set for 1 hour
- Place the frosting in the fridge too or it will get too soft.
*A crumb coat is a thin layer of icing applied to seal the cake layers, trapping runaway crumbs. By crumb coating one layer of frosting means your second layer will be perfect and CRUMB FREE!!!
Once the crumb coat stiffens a bit, pull the cake out of the refrigerator and apply the second layer of frosting to the top and sides of the cake, maybe adding some beautiful swirls like I did to this cake, or just some nice flat swipes like I did this time:
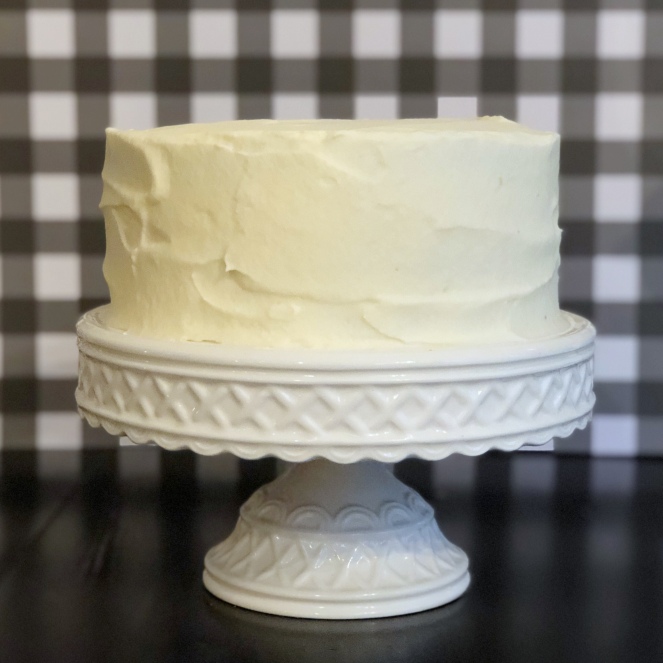
Now you are ready to SERVE!!! Cut into this pure white frosting and see the dramatic insides emerge!

Ok, you good little wifey, mark your calendar for your next fun holiday or dinner party and surprise your guests with this fabulous, mouth-watering treat!
Happy Hump Day, y’all!
xo, Melis
Printable recipe graphic here:

To print: from your computer, put your mouse cursor over the recipe above. Right click your mouse and a pop-up window will appear. Select “Save Image As” and I save it to my desktop where I have a folder titled “recipes”. Double click on saved file (In this case: WaldorfAstoriaCake.jpg) and it will open into a window. Right click over the image again and another pop up window will appear. Select “print” and Tada!

The red of this cake is so pretty – definitely an impressive dessert!
LikeLiked by 1 person
I tend to have a bottle of red food coloring on-hand just to make this cake!!! 🙂
LikeLike
What a gorgeous cake! It’s so rare that I make cake, unless it’s for a birthday but I think that this would be a lovely choice for so many other special milestones!
LikeLiked by 1 person
I never make cake either–EXCEPT for this one!!! If I’m “desserting”, I lean towards making fruity desserts served a la mode! The hot with the cold. Yummmmmm!
LikeLike
I think Red Velvet has got to be one of my favorite cakes! Your version looks spectacular!
LikeLiked by 1 person
I couldn’t agree more!!! It’s always a winner!
LikeLike
Melissa’s account of the Waldorf Astoria cake history in the Monroe family is true. However, a warning must be inserted into her recipe. Before assembly of the layers with the delicious smooth and slippery filling wait for the cakes to cool down. Kathy was preparing my favorite cake for my birthday the next day late at night in a rush to get to bed. She assembled the cake while the layers were right out of the oven. They began to slide and slip off of the plate as the filling melted. What resulted I can not detail. All that I will add is cleaning red velvet cake parts off the counter, walls and ceiling was not the best presentation of Waldorf Astoria Cake! But it was still very tasty. 😄
LikeLike